The Subsurface Economy: Strategic Logic in Hydrological Management
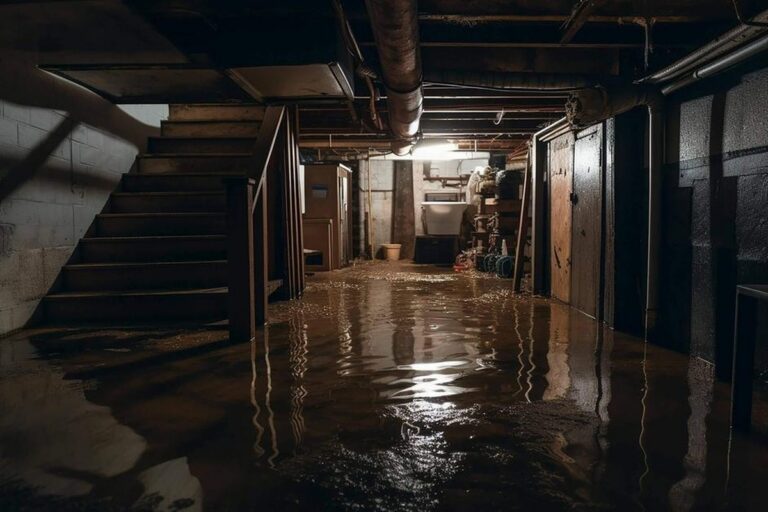
How to plan drainage tile installation on a budget structural preservation is fundamentally a negotiation with the local water table. In the residential and commercial landscape, the drainage tile—often referred to interchangeably as a French drain or footing tile—functions as the primary mechanical relief valve for subterranean hydrostatic pressure. When moisture accumulates against a foundation, it does not merely sit; it exerts a calculated physical force that can compromise masonry units and penetrate the molecular pores of concrete. To manage this force requires a sophisticated understanding of soil porosity, slope dynamics, and material longevity.
The discovery of a damp basement or a saturated yard often prompts a reactive, high-capital response. However, the true complexity of drainage work lies not in the excavation itself, but in the diagnostic phase. Many property owners find themselves trapped between the extreme costs of full-scale professional remediation and the high failure rates of poorly executed “do-it-yourself” attempts. The middle ground—a strategically planned, professionally informed installation—demands a departure from conventional construction “short-cuts” in favor of a long-term engineering perspective.
Navigating the financial constraints of structural dewatering involves a rigorous prioritization of “high-leverage” interventions. It is an exercise in identifying the minimum viable intervention that achieves permanent stabilization. By moving away from the “commodity” mindset of home repair, where one simply buys a solution off the shelf, and moving toward a “systems” mindset, an owner can intercept water before it becomes a structural liability. This article serves as a definitive inquiry into the logistics of subsurface water management, designed for those who seek to secure their property’s future through technical precision rather than excessive spending.
Understanding “How to Plan Drainage Tile Installation on a Budget”
To master how to plan drainage tile installation on a budget, one must first dismantle the assumption that cost is directly correlated with material volume. In the world of subsurface hydrology, efficiency is born from diagnostic accuracy. A multi-perspective explanation reveals that a “budget” project is not a “cheap” project; rather, it is one where every dollar is allocated to the specific hydrological “choke point” of the property. For some, this may mean a shallow curtain drain to intercept surface runoff; for others, it requires a deep footing tile to combat a rising water table.
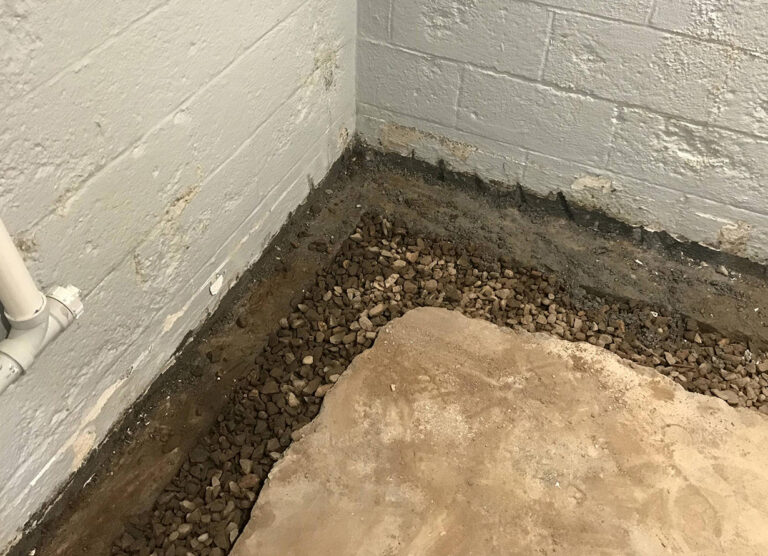
Common misunderstandings often stem from the “dig-and-dump” approach. Many installers focus on the pipe itself, yet the pipe is merely the transport mechanism. The true “engine” of a drainage tile is the gravel envelope and the geotextile filter. Oversimplifying this system by using low-grade “sock-pipes” from big-box retailers often leads to systemic failure within three to five years as silt infiltrates the perforations. A budget-conscious plan avoids this “re-work” cost by investing in high-percolation aggregates and commercial-grade fabrics from the outset, even if the total linear footage of the drain must be reduced to compensate for the higher material quality.
The risk of oversimplification also appears in the “exit logic” of the system. A drainage tile is a circuit; if the water has nowhere to go at the terminus, the entire system becomes a subterranean reservoir that actually increases hydrostatic pressure against the house. Planning on a budget requires a realistic assessment of the “daylight” or “sump” exit. If the property’s topography doesn’t allow for a gravity-fed exit, the budget must prioritize a high-quality basin and pump, as the mechanical lift becomes the most critical point of failure in the entire structural defense.
Contextual Background: From Clay Pipes to Geotextiles
How to plan drainage tile installation on a budget the evolution of subsurface drainage is a history of material endurance. In the 19th century, “drain tile” was literal—segments of unglazed terra cotta or clay pipe laid end-to-end. These systems relied on the slight gaps between sections to admit water. While effective, they were prone to “heaving” in frost-prone climates and were frequently colonized by tree roots. The shift toward perforated plastic in the mid-20th century solved the weight and alignment issues but introduced new vulnerabilities, specifically the risk of “crushing” under heavy soil loads.
Today, the industry utilizes High-Density Polyethylene (HDPE) and Polyvinyl Chloride (PVC) with precision-engineered perforations. We have moved from “passive” drainage—simply hoping the water finds the pipe—to “active” drainage planes that utilize dimpled membranes and specialized “clean-outs.” For the modern owner, this historical context is vital: it reminds us that while the materials have changed, the fundamental goal of creating a “path of zero resistance” remains the same. The budget-conscious planner looks for the modern equivalent of that terra cotta reliability—solid-wall perforated PVC—over the flimsy corrugated “coil” pipes that dominate the lower end of the market.
Conceptual Frameworks: The Physics of Perforation
Professional drainage planning utilizes several mental models to ensure the system survives the decades:
-
The “Sieve” Mental Model: Viewing the trench as a multi-stage filter. The soil is the primary filter, the gravel is the secondary filter, and the geotextile is the final gatekeeper. If the sieve fails at any stage, the pipe becomes a “mud-conduit.”
-
The “Head Pressure” Gradient: Recognizing that water moves from high pressure to low pressure. The drainage tile creates a “low-pressure void” in the soil. The goal is to ensure this void is always the easiest path for the water to travel.
-
The “Silt-Velocity” Theory: Understanding that if water moves too slowly through the pipe, sediment will drop out and settle. Budget planning must ensure a minimum slope of 1/8 inch per foot (approx. 1%) to keep the system self-cleaning.
Key Categories of Drainage Systems and Trade-offs
Selecting a system involves matching the mechanical action to the specific soil “hydraulic conductivity.”
Decision Logic: The “Soil-Load” Filter
In heavy “Clay” soils, the logic mandates a Larger Gravel Envelope. If the budget is tight, it is better to have a shorter run of pipe with a massive gravel bed than a long run of pipe with minimal gravel. In “Sandy” soils, the focus shifts entirely to the Geotextile Quality, as fine sand is the most common cause of “pipe-silting.”
Detailed Real-World Scenarios and Decision Logic
Scenario A: The “Uphill” Neighbor
A property sits at the base of a slope. Every rain event saturates the backyard and pushes water against the rear foundation. The budget-conscious plan avoids a full foundation excavation. Instead, it utilizes a “Shallow Curtain Drain” placed 15 feet away from the house. By intercepting the water before it reaches the foundation, the owner achieves stabilization at 30% of the cost of a deep footing tile.
Scenario B: The “High Water Table” Slab
A home on a slab-on-grade foundation experiences water seeping through floor cracks. The logic: The water is coming from below, not the side. The management logic requires a “Perimeter Interior Drain.” This involves jackhammering the edge of the slab. While invasive, it is the only way to “plan drainage tile installation on a budget” when the water table is the primary antagonist, as exterior excavation would require removing porches and utilities.
Planning, Cost, and Resource Dynamics
The economics of drainage are characterized by the “Ratio of Labor to Material.” Approximately 70% of the cost of a professional installation is labor (excavation and hauling).
-
Direct Costs: PVC Pipe ($1.50–$3.00/ft), #57 Washed Stone ($40–$60/ton), Non-woven Geotextile ($0.50–$1.00/sq. ft.).
-
Indirect Costs: Tool rental (mini-excavator/trencher), utility marking (811), and lawn restoration (sod/seed).
-
Opportunity Cost: Choosing not to install “Clean-out Ports.” Spending $100 on two PVC T-junctions today prevents a $2,000 “hydro-jetting” bill or a full system replacement in ten years.
Tools, Strategies, and Support Systems
To execute a definitive plan, the following technical strategies are required:
-
Laser Levels or Transit Levels: Essential for maintaining a consistent 1% slope. Gravity is the only “pump” that never fails.
-
Non-Woven Geotextile (4oz or higher): Never use “weed barrier.” You need a fabric that allows high-volume water flow while stopping micron-sized silt.
-
Washed Aggregate: Using “CR-6” or “Crush and Run” is a fatal mistake; the “fines” in that gravel will cement the pipe shut. Only use #57 or #67 washed stone.
-
Trench Spacers: Ensuring the pipe is centered in the gravel bed, with at least 4 inches of stone on all sides.
-
Clean-out Risers: Bringing a solid PVC pipe to the surface at every 90-degree turn to allow for future camera inspections.
-
Catch Basins: For areas where surface debris (leaves) is high, preventing that debris from ever entering the perforated tile.
Risk Landscape and Failure Modes How To Plan Drainage Tile Installation On A Budget
The “Taxonomy of Failure” in drainage is often a result of “Substrate Migration.”
-
The “Sock-Pipe” Failure: Corrugated pipe with a pre-installed sleeve often fails because the fabric is too thin and the ridges of the pipe trap sediment.
-
The “Reverse Slope” Trap: A single low spot in the trench creates a “settling basin” where silt accumulates until the pipe is blocked.
-
The “Root Intrusion” Mode: Planting water-hungry trees (willows, maples) near the drainage line. Budget plans must maintain a 15-foot “no-tree zone” around the tile.
-
Compounding Risks: If the system discharges into a “Dry Well,” that well must be sized for a “10-year storm.” An undersized dry well will back up, turning the drainage tile into a pressurized irrigation system against the house.
Governance, Maintenance, and Long-Term Adaptation
A drainage system requires a “Governance” schedule to remain a structural asset:
-
Annual Terminus Inspection: Ensuring the exit pipe isn’t blocked by mulch, rodent nests, or ice.
-
Post-Storm Audit: Checking the “catch basins” after the first heavy rain of spring to remove silt.
-
Review Cycles: Every 5 years, use a “garden hose test”—run water into the clean-out and ensure it reaches the exit within a reasonable timeframe.
-
Adjustment Triggers: If a new “soft spot” appears in the lawn, it’s a trigger that the geotextile may have “blinded” (clogged), requiring a localized gravel refresh.
Measurement, Tracking, and Evaluation How To Plan Drainage Tile Installation On A Budget
How do you evaluate a “hidden” system?
-
Flow-Rate Benchmark: Time how long it takes for a gallon of water to travel from the farthest clean-out to the exit. Record this in the “Home Maintenance Log.”
-
Basement Humidity Differential: In a successful footing tile installation, the basement RH should drop by 15-20% as the “vapor pressure” from the soil is relieved.
-
Visual Signals: The absence of “standing water” within 30 minutes of a heavy rain event.
-
Documentation: A hand-drawn or GPS-mapped “Site Plan” showing the exact burial depth and location of the tiles for future landscaping projects.
Common Misconceptions and Industry Myths
-
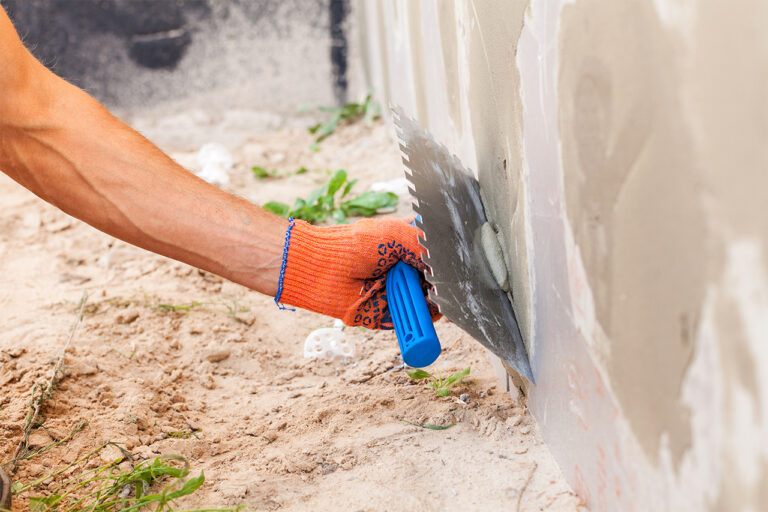
Myth: “Waterproofing paint is a substitute for drainage.” Reality: Paint handles “vapor”; drainage tile handles “volume.” You cannot paint away hydrostatic pressure.
-
Myth: “The deeper the trench, the better.” Reality: A trench that is too deep can actually destabilize the “angle of repose” of the foundation soil.
-
Myth: “You can use gravel from your driveway.” Reality: Driveway gravel contains “fines” that will clog the system.
-
Myth: “Corrugated pipe is easier to install.” Reality: It is easier to lay, but harder to maintain and prone to “snaking” (moving out of slope) during backfill.
-
Myth: “I can drain my tiles into the city sewer.” Reality: In most US municipalities, this is illegal and can lead to heavy fines and basement backups.
Conclusion How To Plan Drainage Tile Installation On A Budget
The structural integrity of a property is determined by the efficiency of its exit strategy for water. Learning how to plan drainage tile installation on a budget is an exercise in engineering honesty—accepting that while labor is expensive, material shortcuts are even more so. By prioritizing high-grade PVC, washed aggregate, and commercial geotextiles, and by maintaining a rigorous focus on gravity-fed slopes, an owner can secure their foundation against the relentless pressure of the earth. A well-planned drainage tile is a silent sentinel; it is a system that, once correctly installed, should remain invisible and effective for the duration of the building’s life.