The Precision of the Envelope: A Technical Synthesis of Exterior Sealant Integrity
Common exterior sealant mistakes the exterior envelope of a building is a dynamic assembly, subject to the unrelenting forces of thermal expansion, UV degradation, and moisture infiltration. Within this assembly, the sealant joint is perhaps the most undervalued component, tasked with maintaining a flexible, impermeable bridge between disparate materials such as masonry, glass, aluminum, and wood. While these joints represent a negligible fraction of a project’s total surface area, their failure is a primary catalyst for systemic degradation, leading to structural rot, diminished R-values, and the proliferation of biological growth within wall cavities.
Engineering a durable seal is not merely a task of application but a discipline of material science and geometric precision. A common error in contemporary construction is the treatment of sealant as a “gap-filler” rather than a high-performance elastomeric bridge. When a joint fails, the focus typically shifts to the product’s quality, yet the reality is that most failures are rooted in the nuances of substrate preparation and joint design. The chemical bond between a sealant and its substrate is sensitive to microscopic contaminants, moisture levels, and temperature fluctuations during the curing phase—variables that are frequently overlooked in the haste of production schedules.
As we move toward high-performance building standards and increasingly complex architectural geometries, the margin for error in sealant application has narrowed significantly. The integration of modern claddings—such as Fiber Cement or Composite Metal Panels—demands a sophisticated understanding of how these materials move relative to one another. To achieve long-term organic visibility and structural resilience, one must move beyond the superficial. This article serves as an authoritative reference for identifying and rectifying the technical oversights that compromise the building’s first line of defense.
Understanding “Common Exterior Sealant Mistakes”
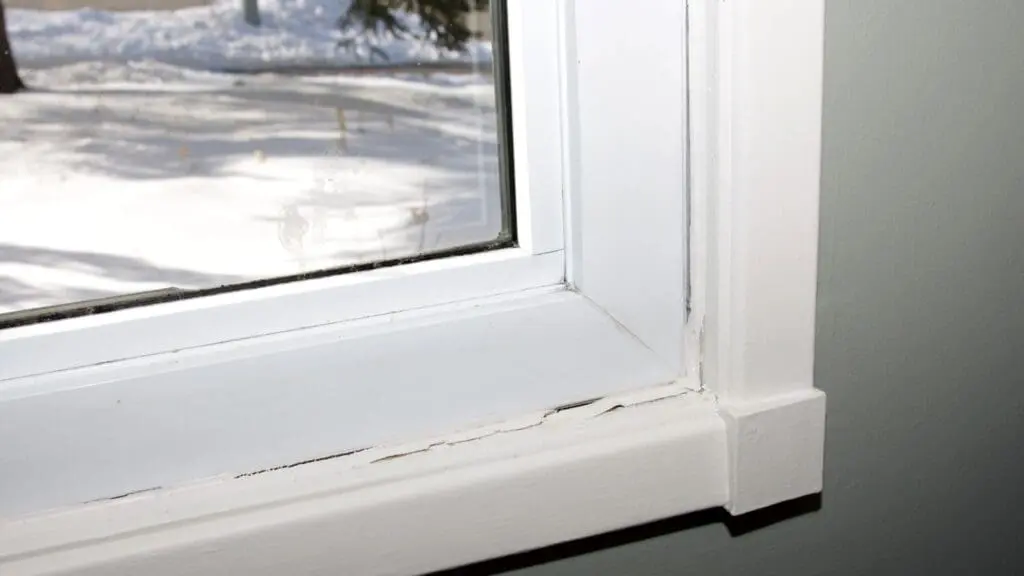
At the heart of common exterior sealant mistakes lies a fundamental misunderstanding of joint mechanics. Most property owners and even some general contractors view sealant as a static adhesive. In reality, a sealant joint is a moving part. It must expand in the winter when substrates contract and compress in the summer when materials swell. When a joint is overfilled or applied to a “three-sided” bond, it loses its ability to flex, leading to cohesive failure (the sealant tears) or adhesive failure (the sealant pulls away from the wall).
The risk of oversimplification often manifests in the “one-size-fits-all” product selection. High-performance projects require specific chemistries—silicones for glass and metal, polyurethanes for masonry, and hybrids for transitional areas. Using a high-modulus (stiff) sealant in a high-movement joint is a frequent error; the material’s strength becomes its own enemy, exerting more force on the bond line than the substrate can handle. Conversely, using a low-modulus sealant in a high-traffic or abrasion-prone area leads to premature physical wear.
Furthermore, the environmental conditions during the “window of application” are critical. Applying sealant to a substrate that is too cold, too hot, or slightly damp (even if it appears dry to the eye) compromises the molecular bond. Many failures attributed to “bad product” are actually the result of “interstitial moisture”—microscopic water trapped between the sealant and the substrate that prevents the chemical cross-linking required for a permanent seal.
Contextual Background: From Putty to Polymers
Common exterior sealant mistakes historically, exterior sealing was a rudimentary craft. Early American architecture relied on oil-based putties and oakum (hemp fiber soaked in tar) to plug gaps in timber and masonry. These materials were functionally limited; they lacked elasticity and required frequent replacement as they oxidized and turned brittle. The mid-20th century saw the introduction of butyl rubbers and polysulfides, which offered the first true “elastomeric” properties, allowing buildings to move without immediate seal failure.
The 1970s and 80s marked the emergence of high-performance silicones and polyurethanes, shifting the focus from “plugging holes” to “engineering joints.” Today, we are in the era of Silylated Polyethers (Hybrid sealants), which combine the UV resistance of silicone with the paintability and adhesive strength of polyurethane. Despite these advancements in material science, the rate of sealant failure remains high. This paradox exists because material complexity has outpaced the general labor force’s understanding of “joint geometry”—the specific width-to-depth ratios required for these polymers to function as intended.
Conceptual Frameworks and Mental Models Common Exterior Sealant Mistakes
To navigate the complexities of building envelope sealing, one should utilize these mental models:
-
The “Hourglass” Geometry Model: This model dictates that a sealant joint should be thinner in the middle than at the edges. This concentrates the stress in the center of the material where it is most flexible, rather than at the bond line where it is most vulnerable.
-
The “Three-Sided Bond” Trap: This is the most prevalent of common exterior sealant mistakes. Sealant should only touch two sides of a joint. If it touches the back of the gap, it cannot stretch; it becomes “pinned,” and the internal tension will inevitably tear the material.
-
The Thermal Bridge Analogy: Just as insulation prevents heat transfer, a sealant joint prevents moisture transfer. This model emphasizes that a single “pinhole” in a sealant bead is functionally equivalent to no sealant at all, as air pressure differentials will drive water through that minor breach with surprising velocity.
Key Categories of Sealant Variations and Trade-offs
Selecting the wrong chemistry is a foundational error. Each material has a specific “performance envelope.”
Decision Logic: The Compatibility Matrix
A realistic decision logic must prioritize “Substrate Compatibility” above all else. For instance, silicones often cause “staining” on porous natural stones (like limestone) because the silicone oils leach into the rock. In such cases, a non-staining polyurethane or a specialized hybrid is the only technically sound choice.
Detailed Real-World Scenarios and Decision Logic Common Exterior Sealant Mistakes
Scenario A: The Multi-Story Window Retrofit
In high-rise applications, wind loads create significant “racking” of the window frames. The failure mode here is often adhesive failure because the installer failed to use a primer on the aluminum frames. The decision logic must include a “Tape Adhesion Test” prior to the start of the project to verify that the chosen sealant can withstand the calculated wind-induced movement.
Scenario C: Fiber Cement Siding Installation
Fiber cement is a dimensionally stable material, but the wood framing behind it is not. A frequent error is “butt-jointing” the siding and filling the gap with a stiff caulk. As the house settles and the framing dries, these joints open up. The correct logic requires a 1/8-inch gap and a high-movement hybrid sealant that can handle the divergent rates of contraction.
Planning, Cost, and Resource Dynamics
The economics of sealant application are deceptively skewed toward the “initial cost.” While a tube of high-performance hybrid sealant may cost 3x as much as a standard acrylic, the “failure cost” is exponentially higher.
-
Direct Costs: High-quality sealant, closed-cell backer rods, and substrate primers.
-
Indirect Costs: Access equipment. On a commercial building, the cost of the scaffolding or lift often exceeds the cost of the sealant by a factor of 10. Failing to use the best material means paying for that lift twice in five years.
-
Opportunity Cost: A leaking sealant joint in a commercial facility can lead to tenant turnover, mold remediation claims, and a permanent reduction in the property’s market valuation.
Tools, Strategies, and Support Systems
To avoid common exterior sealant mistakes, the following support systems must be utilized:
-
Backer Rods: Essential for controlling sealant depth and preventing three-sided bonding.
-
Bond-Breaker Tape: Used in shallow joints where a backer rod cannot fit, ensuring the sealant only adheres to the sides.
-
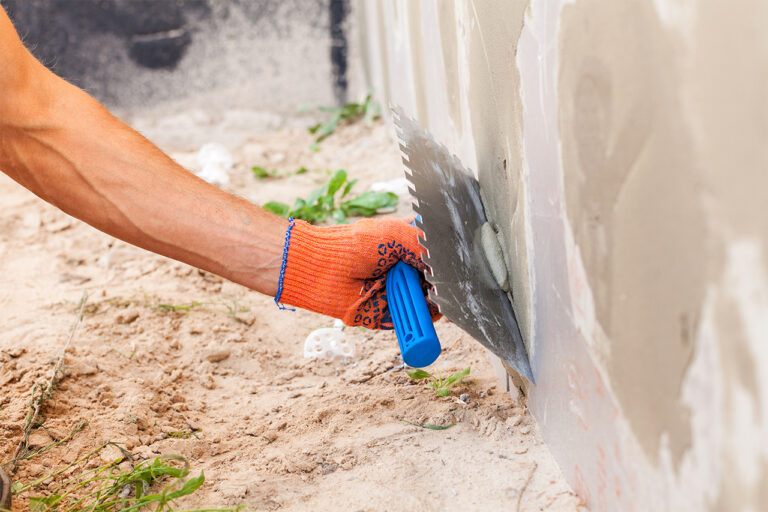
Substrate Primers: Often omitted to save time, primers are vital for long-term adhesion to challenging surfaces like Kynar-coated metals.
-
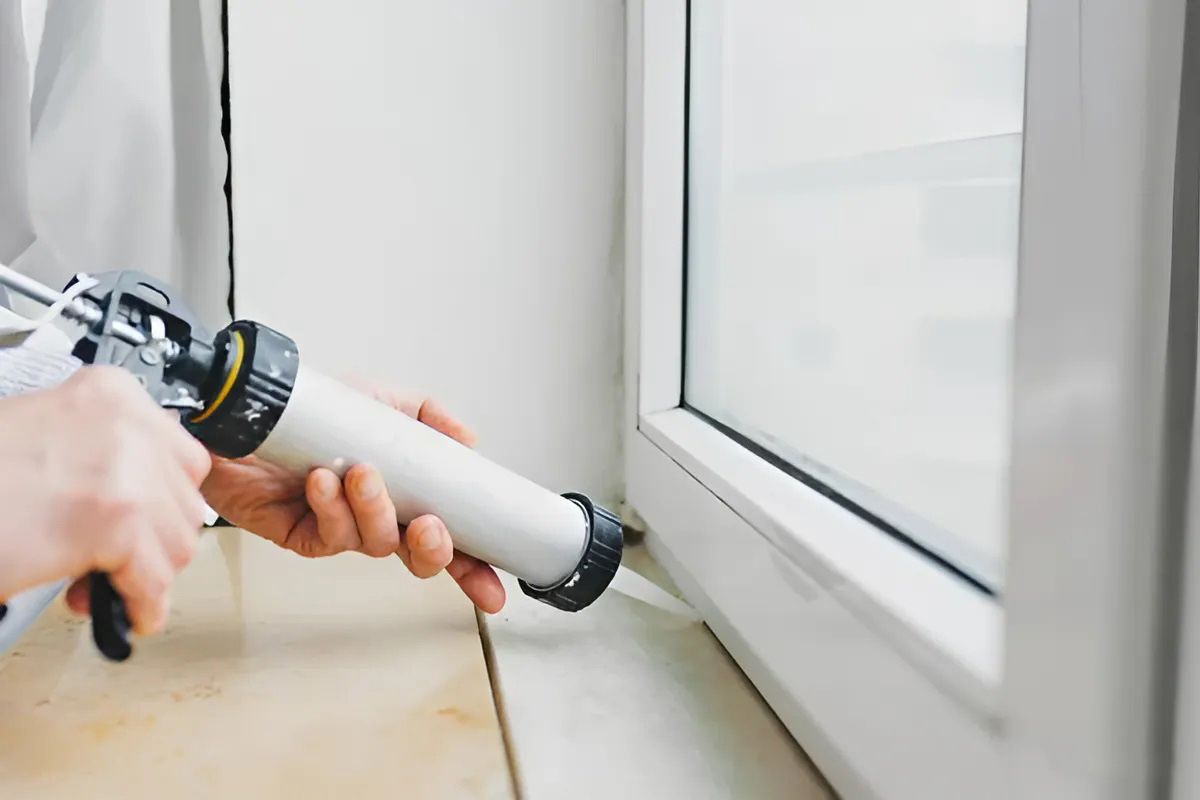
Air-Powered Caulking Guns: Provide a consistent “bead” pressure, reducing the human error associated with hand-pumping.
-
Spatulas/Tooling Knives: Used to “force” the sealant into the joint walls (wetting) rather than just smoothing the surface.
-
Surface Cleaners (Isopropyl/Solvents): Crucial for removing the “factory film” from new windows or dust from masonry.
-
Digital Thermometers: To ensure the substrate temperature is within the manufacturer’s specified “application window.”
Risk Landscape and Compounding Failure Modes Common Exterior Sealant Mistakes
Sealant failure is rarely a “static” problem; it is a compounding one.
Taxonomy of Risks:
-
Adhesive Failure: The sealant peels away. This is usually due to poor cleaning or lack of primer.
-
Cohesive Failure: The sealant tears down the middle. This is almost always due to improper joint width-to-depth ratios (too thick).
-
The “Out-gassing” Effect: When sealant is applied to a porous substrate that is heating up, the air inside the substrate expands and blows “bubbles” through the wet sealant, creating permanent leak paths.
-
UV Degradation: Using an interior-grade or low-quality polyurethane in direct sunlight leads to “alligatoring” and eventual powdering of the material.
Governance, Maintenance, and Long-Term Adaptation
A building’s sealant should be governed like a mechanical system, not a set-it-and-forget-it finish.
-
Annual Visual Audit: Checking for “chalking” or hairline separations at window perimeters.
-
The “Probe” Test: Every 3 years, a technician should gently probe suspect joints with a blunt tool to check for “reversion” (the sealant turning back into a liquid/goo) or loss of elasticity.
-
5-Year Recaulking Cycle: For high-exposure south-facing walls, a proactive replacement cycle is often more cost-effective than waiting for a structural leak to appear.
-
Documentation: Keeping a “Sealant Map” of the building, noting which chemistries were used where, is essential for future repairs, as different sealants (like silicone and polyurethane) are chemically incompatible and will not stick to each other.
Measurement, Tracking, and Evaluation Common Exterior Sealant Mistakes
Efficacy is measured through rigorous field testing:
-
The “Pull” Test (ASTM C1521): Cutting a tab of the cured sealant and pulling it to verify that the bond to the substrate is stronger than the material itself.
-
Infrared Thermography: During a rain event, using a thermal camera to detect “cold spots” inside the wall, which indicate moisture bypassing the sealant.
-
Water Penetration Testing (ASTM E1105): Creating a “rain chamber” over a window joint and applying negative air pressure from the inside to see if water is pulled through the seal.
Common Misconceptions and Industry Myths
-
Myth: “More sealant is better.” Reality: A thick joint is a stiff joint. Thinner joints (within the 1:2 depth-to-width ratio) are actually more durable because they flex easier.
-
Myth: “You can just caulk over old sealant.” Reality: New sealant will almost never bond to old sealant, especially silicone. The old material must be 100% mechanically removed.
-
Myth: “Soap and water are good for tooling.” Reality: Tooling with soapy water can introduce surfactants between the sealant and the wall, causing the edges to peel back prematurely.
-
Myth: “All silicones are the same.” Reality: “Acetoxy” silicones (vinegar smell) can corrode certain metals and fail on masonry; neutral-cure silicones are required for most construction applications.
-
Myth: “Caulking is a summer job.” Reality: Extremely high heat can cause sealant to “skin over” too fast, preventing it from properly wetting the substrate.
-
Myth: “If it doesn’t leak during a hose test, it’s good.” Reality: A hose test doesn’t simulate the wind-driven pressure of a real storm or the thermal movement of a full season.
Conclusion Common Exterior Sealant Mistakes
The avoidance of common exterior sealant mistakes is a testament to an organization’s commitment to technical excellence. It is the transition from “cosmetic filling” to “performance engineering.” By respecting the laws of chemistry, joint geometry, and thermal movement, a builder can ensure that the smallest component of the envelope provides the greatest contribution to the building’s longevity. A seal is only as strong as its weakest point of adhesion; achieving mastery in this field requires a blend of editorial-grade precision in planning and an unwavering adherence to the material science of the bond.